2. Company Settings
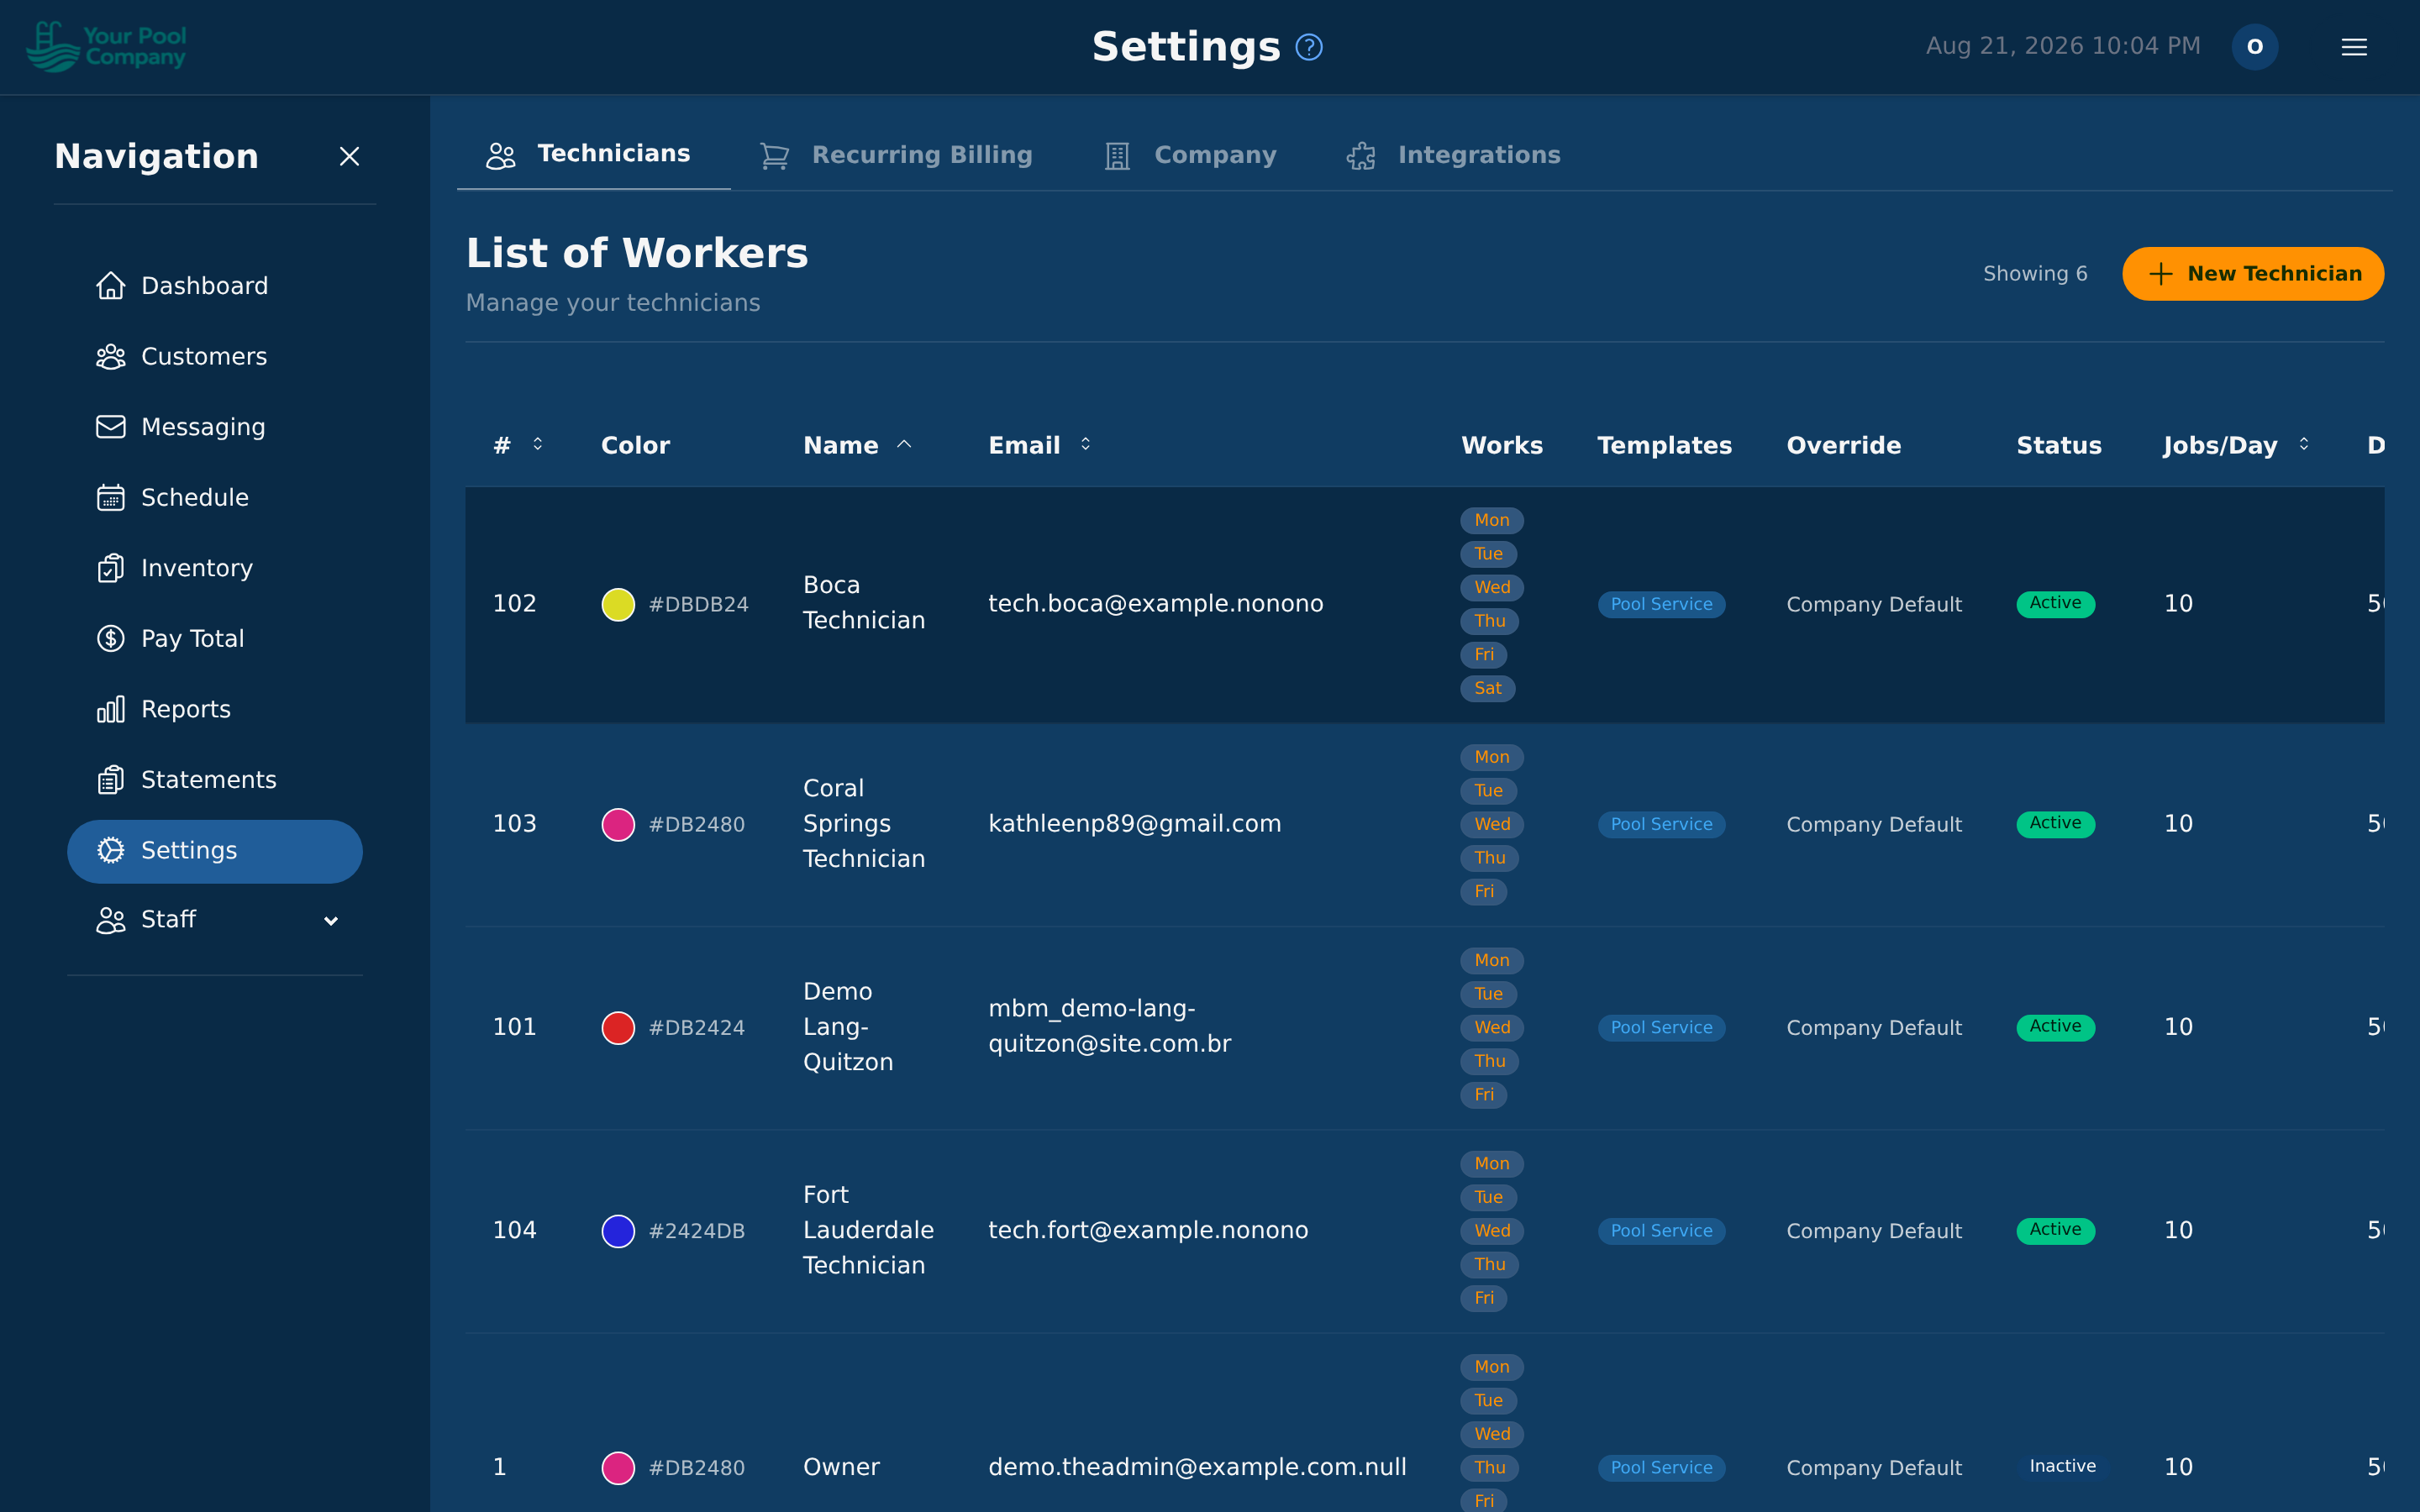
Settings has four tabs:
| Tab | What's in it |
|---|---|
| Technicians | Your technicians and their working hours |
| Recurring Billing | Your services — Recurring Billing Items and One-time Services (see Section 5) |
| Company | Everything on this page |
| Integrations | QuickBooks connection and export |
2.1 Company Profile
Under Settings > Company > General:
- Company Name — shown on statements, PDFs, and the customer portal.
- Company Address, City, State, ZIP — appears on PDFs and messages.
- Company Phone & Email — how customers reach you.
- Time Zone — every schedule and billing date uses this. Set it once and leave it.
- Logo — upload it here. It appears on statements, PDFs, and the portal.
Your brand colour is set in the Setup Wizard, not on this tab — open Settings > Company > Run the Setup Wizard to change it.
2.2 Payment Gateways (Stripe & PayPal)
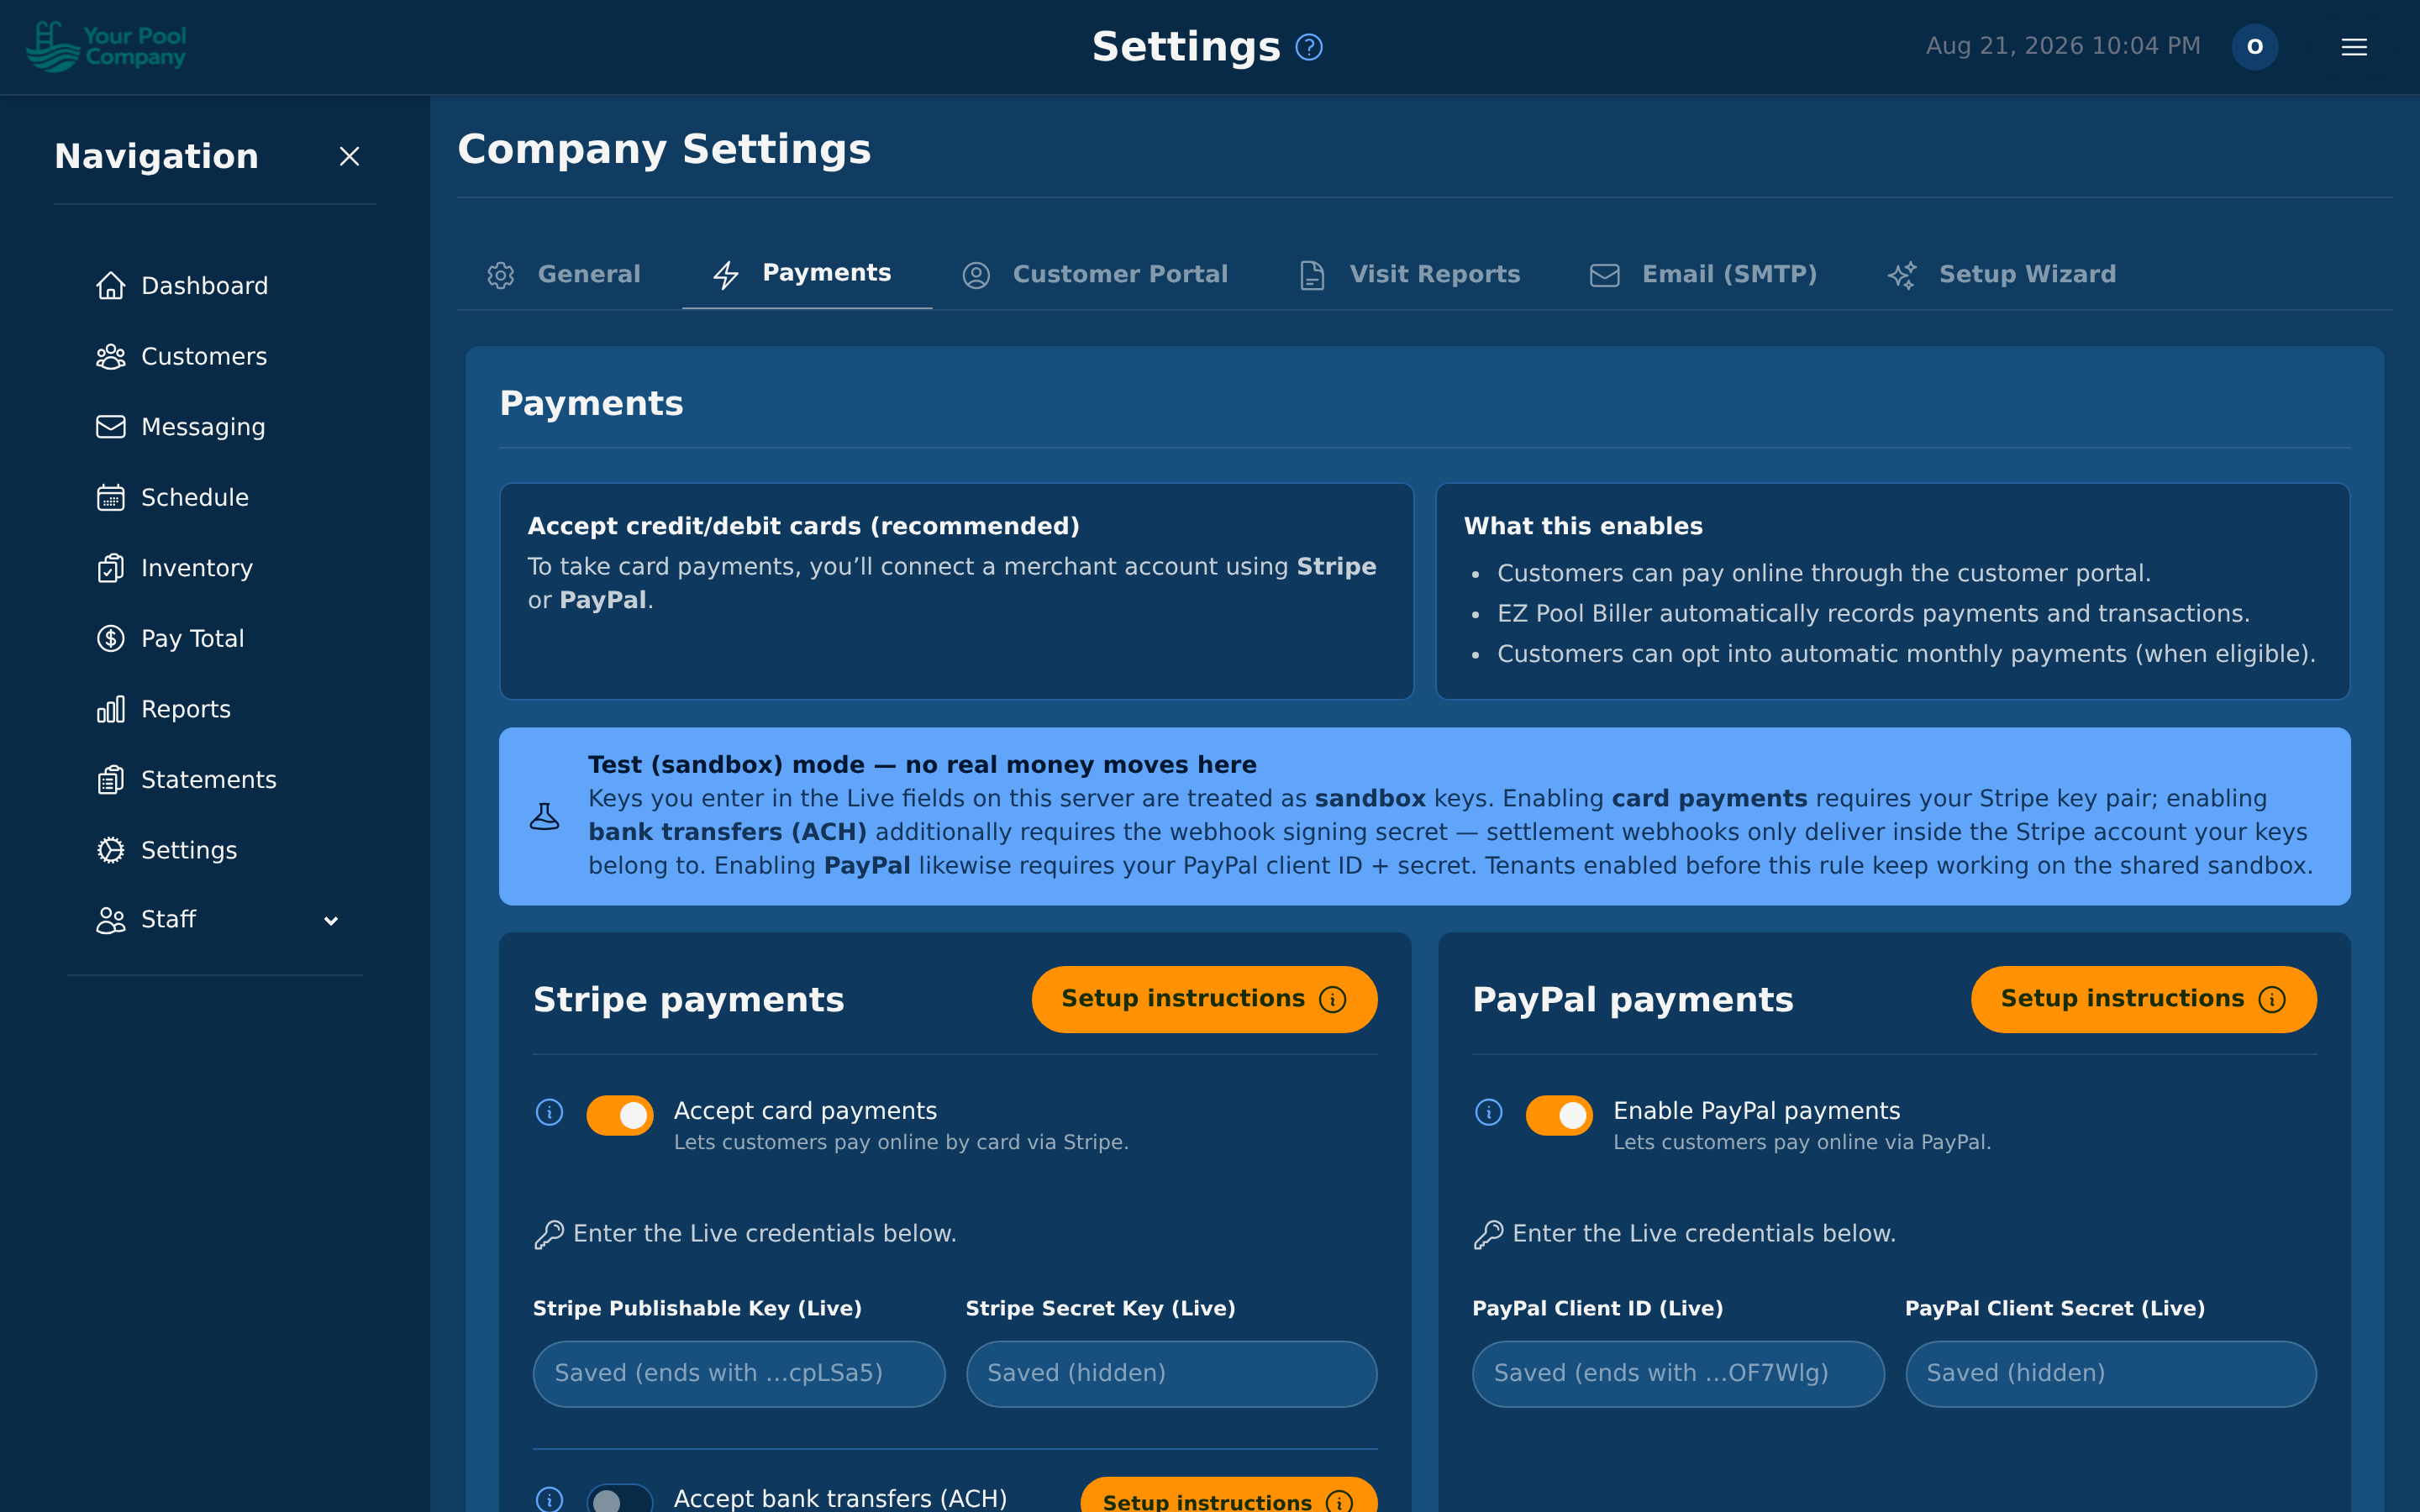
EZ Pool Biller integrates with Stripe and PayPal to process customer payments.
Connecting Stripe:
- Go to Settings > Company and scroll to the Payments section.
- Enter your Stripe API keys (publishable key and secret key).
- Toggle between Test Mode and Live Mode.
- Use Test Mode during setup to verify everything works without charging real cards.
- Switch to Live Mode when you're ready to accept real payments.
Connecting PayPal:
- In the same Payments tab, enter your PayPal credentials.
- PayPal supports both one-time payments and vault-based recurring payments.
Gateway Order: If you have both Stripe and PayPal active, you can set the preferred order for autopay attempts.
Important: Keep your gateway in Test Mode while you're learning the system. Switch to Live Mode only when you're ready to process real payments.
Bank transfers (ACH)
Stripe can also take payments straight from a customer's US bank account. It is worth turning on for larger bills: a bank transfer typically costs 0.8% capped at $5, where a card costs around 2.9% + 30¢. On a $600 bill that is roughly $4.80 instead of $17.70.
Cards and bank transfers are independent switches. You can offer both, or only one — for example, bank transfers only for commercial accounts you bill for large amounts.
Turning it on:
- In Settings > Payments, save your Stripe publishable and secret keys first. Bank transfers run on your own Stripe account, so the keys are required even if you keep card payments switched off.
- In your Stripe dashboard, activate ACH Direct Debit (Stripe may label it "US bank account") under payment methods. Stripe sometimes reviews this before it becomes active.
- Back in Settings > Payments, add your Stripe webhook signing secret. The page has a Setup instructions button that walks through creating the webhook in Stripe step by step, including which events to select.
- Switch on Accept bank transfers (ACH).
- Optionally set an ACH fee — a separate percentage and cap from your card fee, so you can pass on the lower cost.
Why the webhook secret is required: a bank transfer is not instant. Stripe notifies EZ Pool Biller when the money finally clears, and the signing secret is how we verify that notification genuinely came from Stripe. Without it we cannot tell a real settlement from a forged one, so ACH cannot be enabled.
Limits: bank transfers are US-dollar only, and a single payment is capped at $25,000 (cards are capped at $5,000).
2.3 Customer Portal Settings
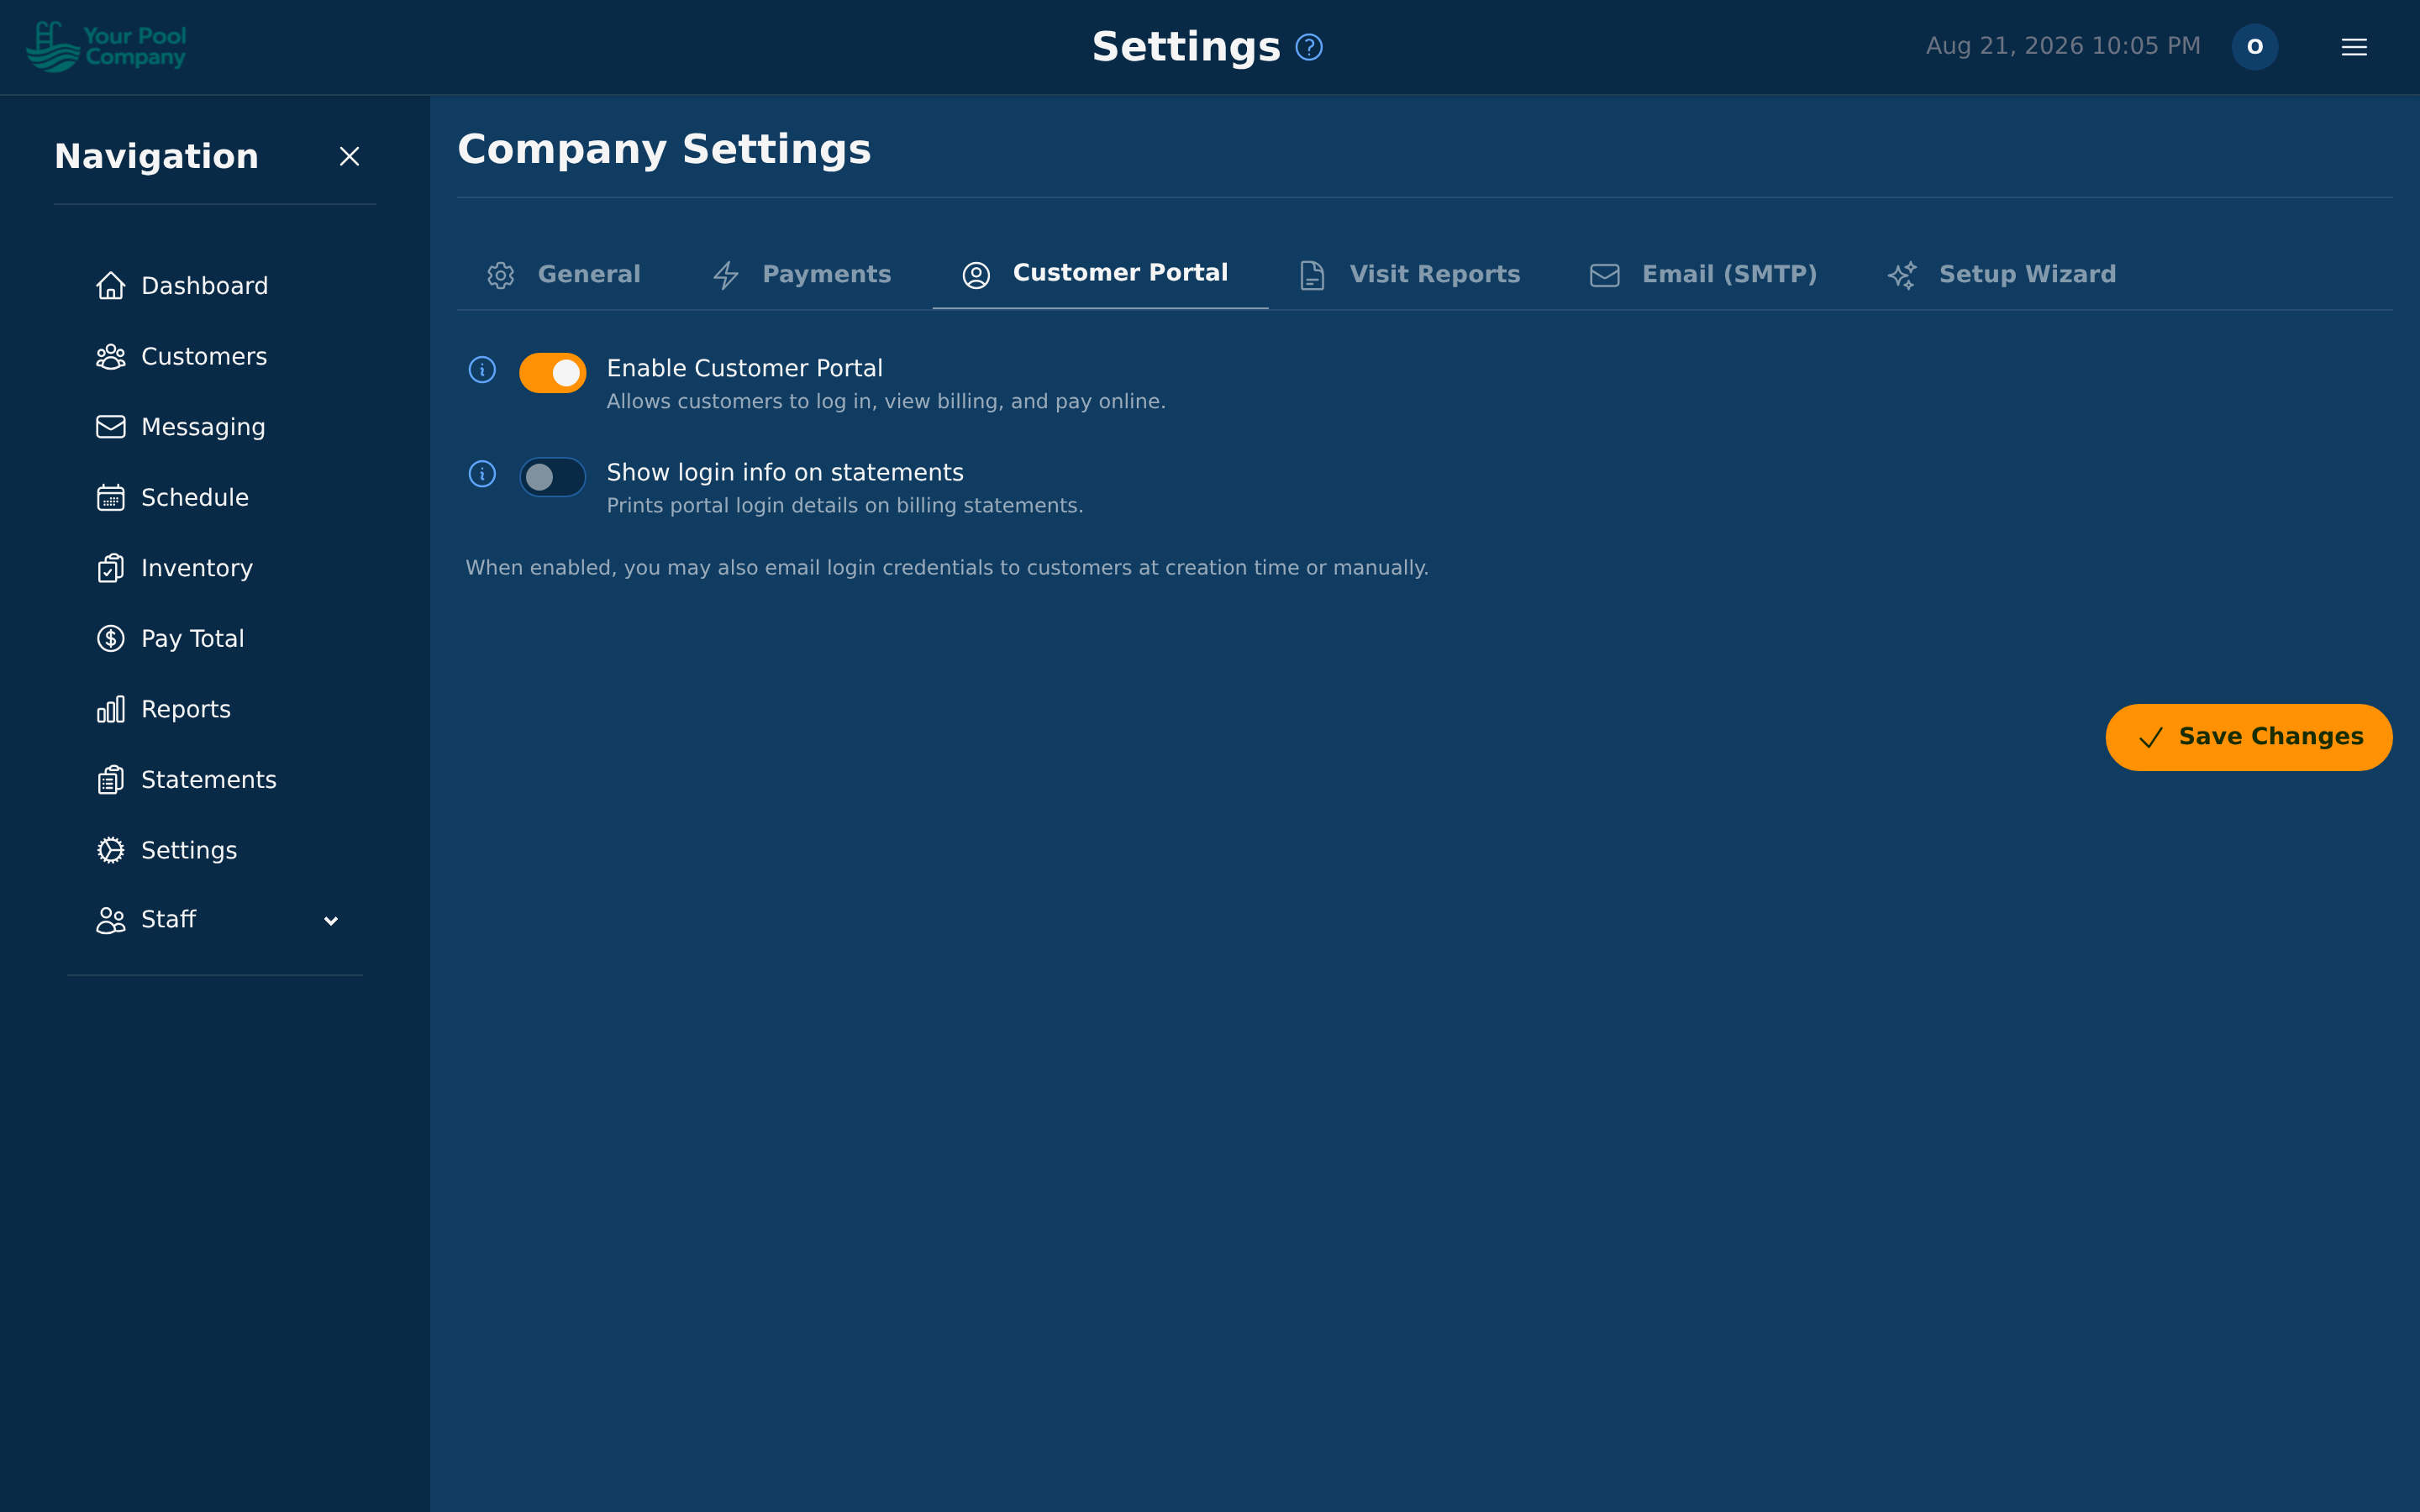
The Customer Portal gives your customers 24/7 self-service access to their account:
- Enable/Disable Portal — toggle portal access for all customers.
- Payment Method Management — allow customers to save, update, or remove their payment methods.
- Show Login on Statements — include a portal login link on PDF statements.
More details on the portal in Section 13.
2.4 Communication Settings (Email & SMS)
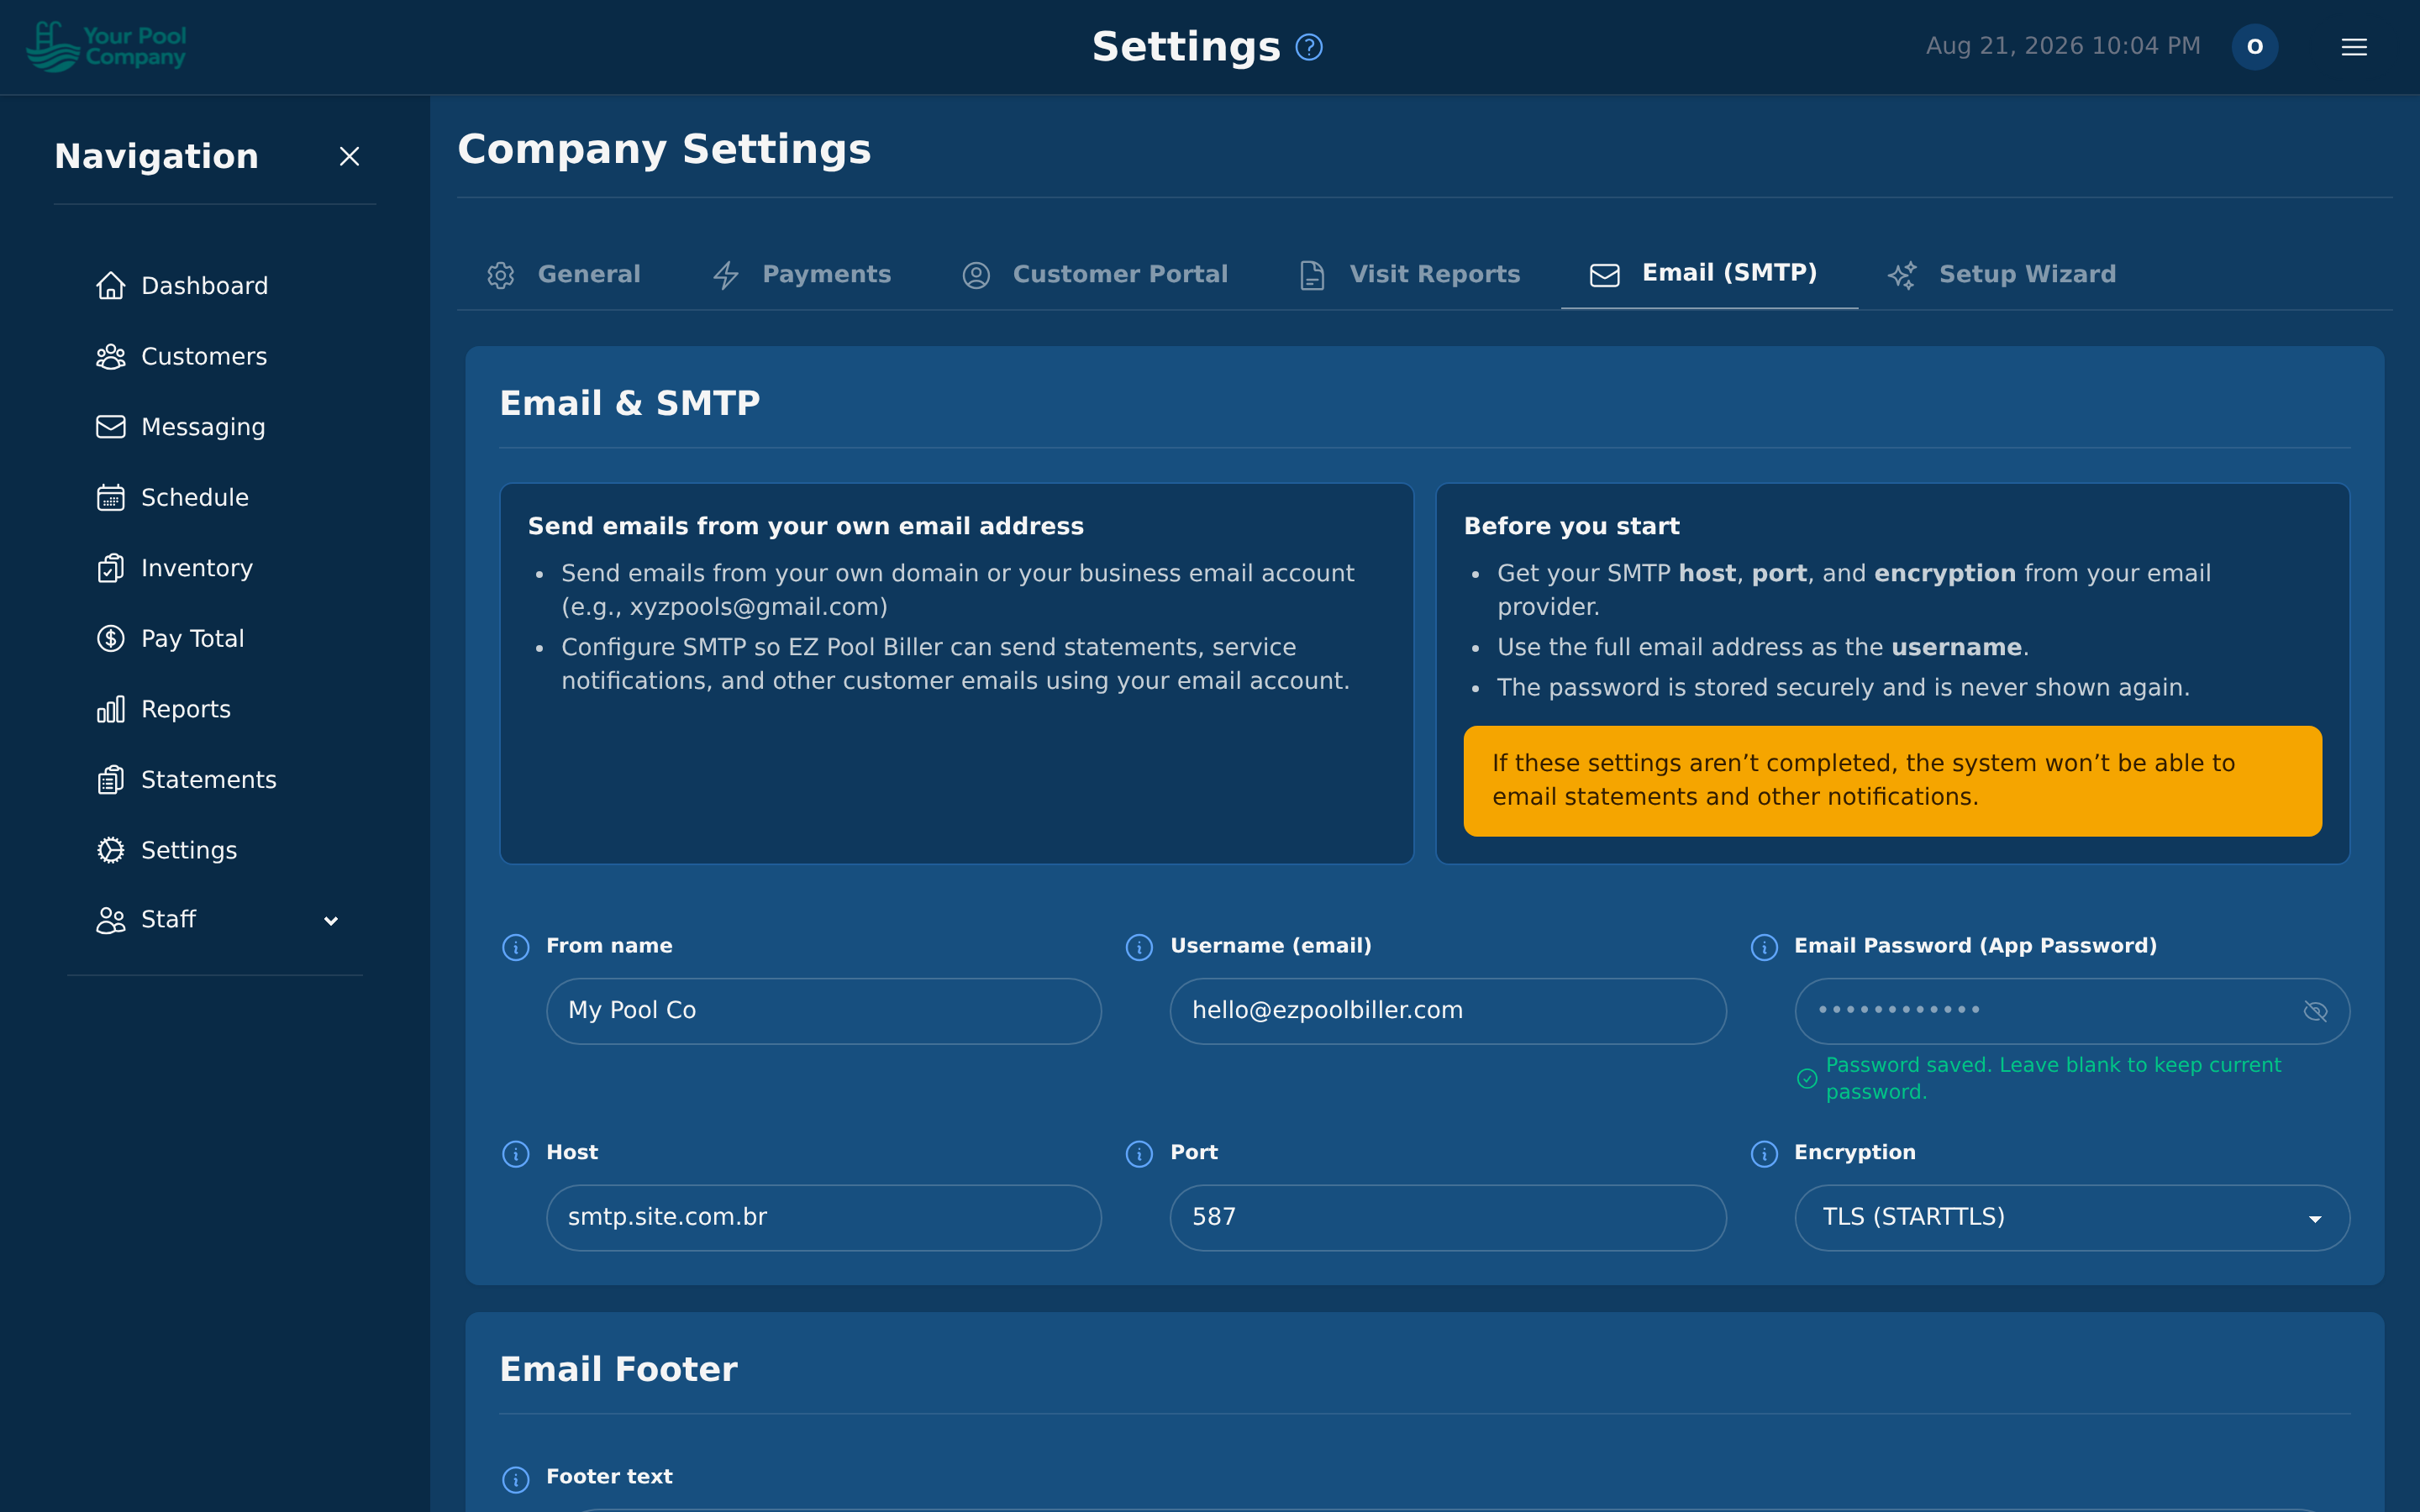
Email (SMTP):
- Configure your SMTP server for outbound emails (statement delivery, visit reports, password resets).
- Set your From Name and From Email.
- Add custom email footer text that appears at the bottom of every email.
SMS:
- SMS messaging uses Twilio. Enter your Twilio Account SID, Auth Token, and sending phone number.
- Once configured, you can send text messages to customers and enable SMS appointment reminders.
2.5 Visit Report Settings
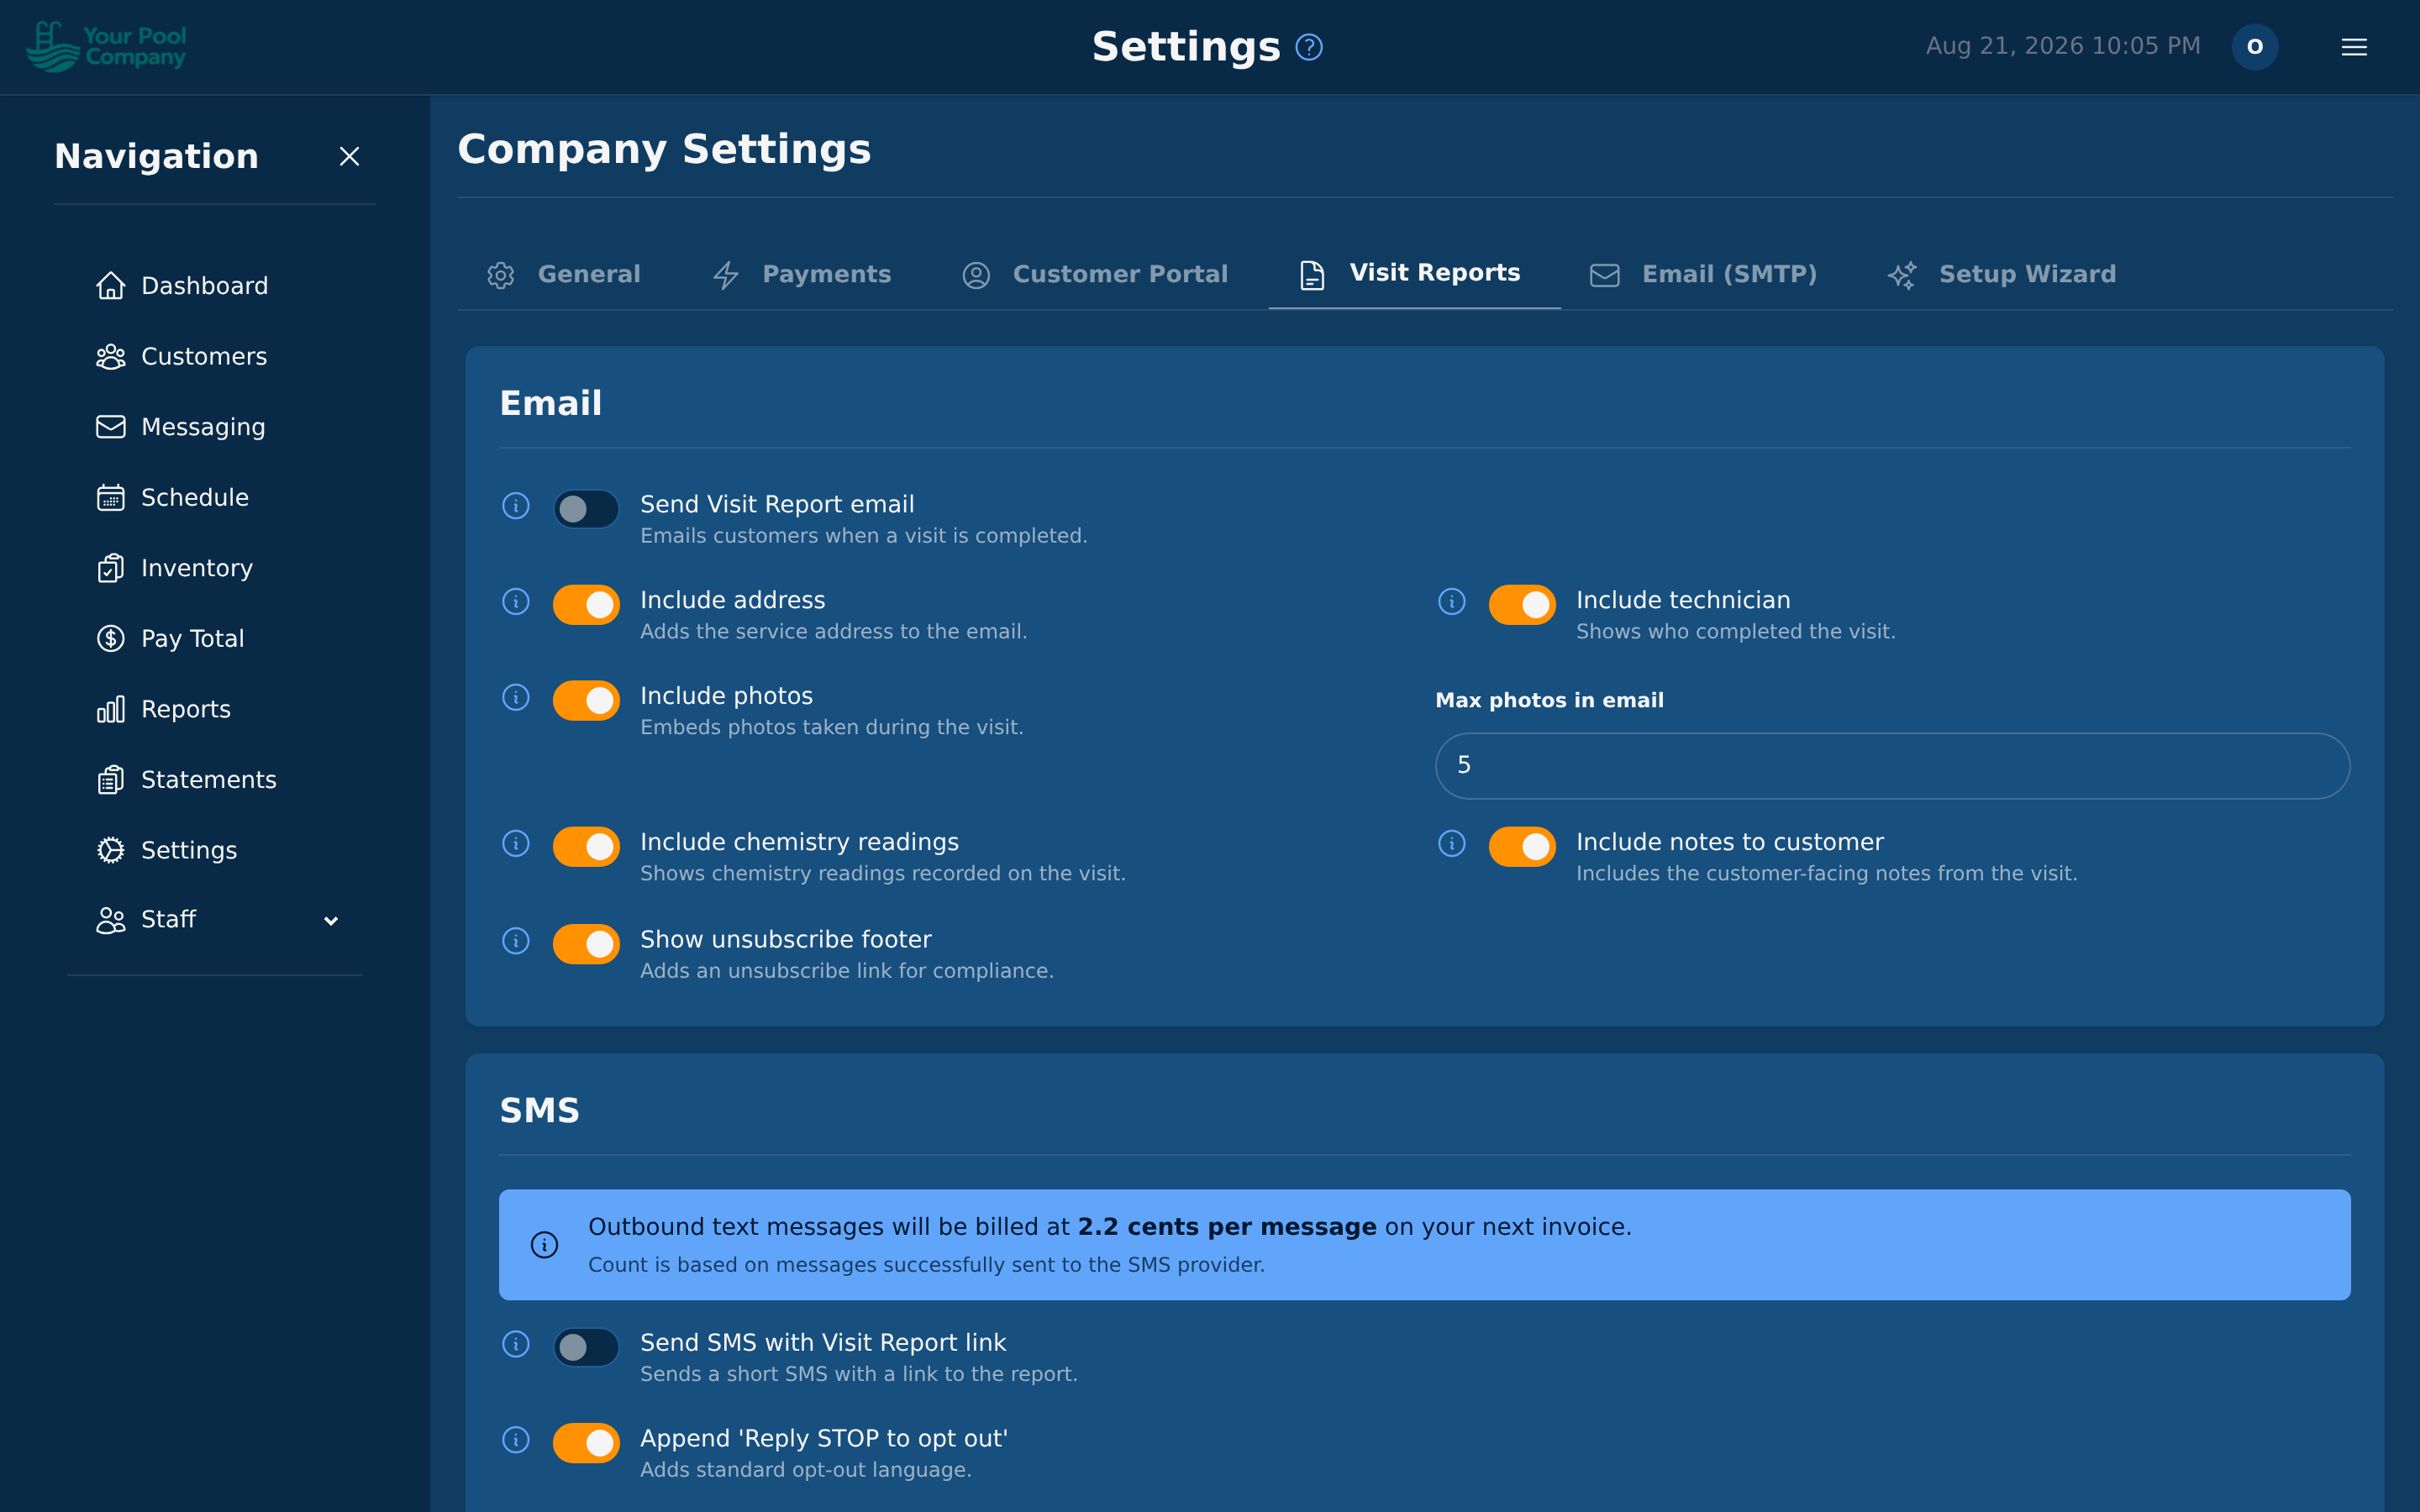
Visit reports are automatic email summaries sent to customers after each service visit. Configure:
- Enable/Disable visit report emails.
- Include Technician Name — show which technician performed the service.
- Include Service Address — show the location address in the report.
- Include Photos — attach service photos taken by the technician.
- Opt-Out Default — whether new customers are opted in or out by default.
Customers can unsubscribe from visit report emails at any time via a link in the email.
2.6 Late Fees
If late fees are switched on for your account, EZ Pool Biller adds them for you. Nobody has to remember.
A late fee is added when a statement is past its due date, the grace period has run out, and there's still a balance owing. It lands on the customer's account as its own Late Fee line, so it's clear what it is.
How much it is depends on how your account is set up: either a flat amount (say $15) or a percentage of what's owed, optionally capped at a maximum. The grace period is how many days after the due date you allow before the fee is added.
You can give an individual customer a longer grace period without changing your default — see Section 10.
2.7 Billing Method (Per-Service vs. Monthly Statement)
This is one of the most important settings for your pool care business. It determines how your customers are billed.
Per-Service Mode:
- A charge is posted each time a service is completed.
- Best for companies that bill per visit, or want billing to keep pace with the work.
- Each completed job puts its own charge on the customer's account straight away.
Monthly Statement (Per-Period) Mode:
- All charges in a month are collected into a single monthly statement.
- The statement period is anchored to a configurable Statement Day (e.g., the 1st of each month).
- At the end of each period, the statement is closed with all charges, payments, and credits.
- Best for companies that send monthly bills.
Either way the customer receives one statement — the method changes when a charge lands on it, not what they are sent. See Section 10.